In our daily work here at No-Nonsense Networks, we continuously connect assets to leverage its data for better decision-making and automating processes. And so while setting up our Christmas tree this year, we came up with the idea to make it IoT connected as well.
We also just had launched our LinkedIn company page and thought it might be cool for people on the internet to control our Christmas lights from LinkedIn. If they would follow our page at the same time, that would make it even better.
So we researched how we could do it, and we got it all up and running in no time. Below we will explain how we did it, so you can create your very own IoT connected Christmas tree next year. We’d love to see what you guys come up with!
The setup
We needed the following things to make it work
- A way the get our follower count on our LinkedIn company page
- A device to control our Christmas lights
- Some code to make it all work together
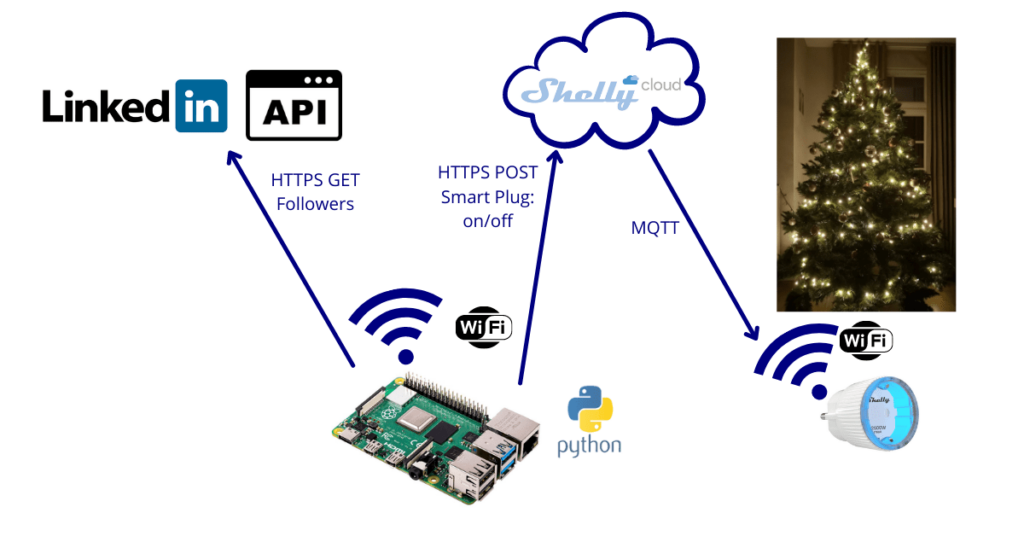
The below picture shows the architecture we ended up with.
Getting the LinkedIn follower count
We found 2 ways to do this. Either using the LinkedIn APIs or using web scraping to get the information. We would only recommend web scraping when you have no other option but since LinkedIn provides all the needed APIs, we decided to take this route.
Their API uses OAuth 2.0 and unfortunately, their documentation isn’t that straightforward if you have never used this. We’ll break it down for you. This is the hardest part of the complete setup and in the end, we’ll link you to a good video that shows all the steps in more detail, so bear with us.
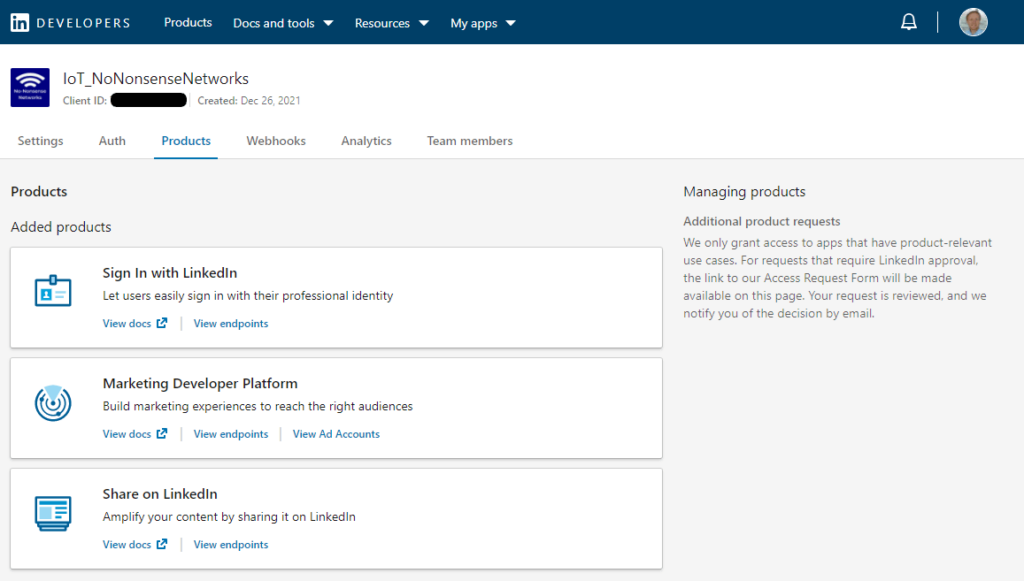
First, you’ll need to create an App on the LinkedIn developer portal. Afterward, you can request access to their “Marketing Developer Platform” which we will need. This took a day for us to get approved. When done it should look like the picture below.
Now you need to follow 3 steps to get the OAuth 2.0 authorization, explained here. When this is done you have the access token you’ll need to make authorized API requests.
Since the API documentation isn’t that beginner-friendly, we recommend you follow this video.
Now we are ready to use the API. We found we could extract the company page follower count using an HTTPS GET or curl command. The response of this API call will be a JSON with just one value being the “firstDegreeSize” or the number of followers on the LinkedIn page.

The Python code below makes use of the requests and JSON library to make HTTPS requests and parse the JSON response into an integer with the follower count we’ll need in the rest of the setup.
import requests
import json
def get_linkedin_followers():
    headers = {
        'Authorization': 'Bearer AQXNnd2kXITHELmWblJigbHEuoFdfRhOwGA0QNnumBI8X...',
    }
    params = (
        ('edgeType', 'CompanyFollowedByMember'),
    )
    response = requests.get('https://api.linkedin.com/v2/networkSizes/urn:li:organization:12345678', headers=headers, params=params)
    #print(response.text)
    #extract the followers count from the json structure
    followers_json=response.text
    followers_dict= json.loads(followers_json)
    #print(followers_dict)
    #print(followers_dict['firstDegreeSize'])
    current_followers_count= int(followers_dict['firstDegreeSize'])
    return current_followers_count
Smart Plug to control the Christmas tree lights
To control the not-so-smart Christmas tree lights we already had, we decided to use a smart plug to be able to turn them on and off via a wireless network and an API call. We first used a LoRaWAN class C smart plug from the company Allora Factory since we had it lying around, together with the Proximus public LoRaWAN network in Belgium. Normally a LoRaWAN (class A) device can only receive a downlink message or instruction after it has just sent some uplink data. But class C LoRaWAN devices are made to continuously listen to incoming commands.
Since not everyone would be able to get their hands on a LoRaWAN smart plug that easily, we ended up using an inexpensive Wi-Fi smart plug from the company Shelly, named the Shelly Plug S.
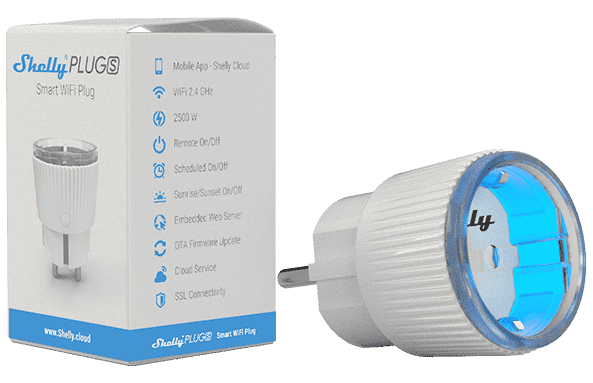
They have a bunch of cool Wi-Fi or Bluetooth relays, switches, plugs, and light bulbs for the connected smart home. We like these because you can control them via the Shelly smartphone app or cloud, but also via local HTTP, MQTT, or via their cloud API. It depends on what device model you have if you have all options or not.
After looking through the different APIs to control the plug on the Shelly documentation page, we decided to use the Cloud control API. The reason is that using HTTP is insecure (even if only used locally) and using MQTT directly with the device would prohibit us from controlling it as well with the Shelly smartphone app which would be a pity.
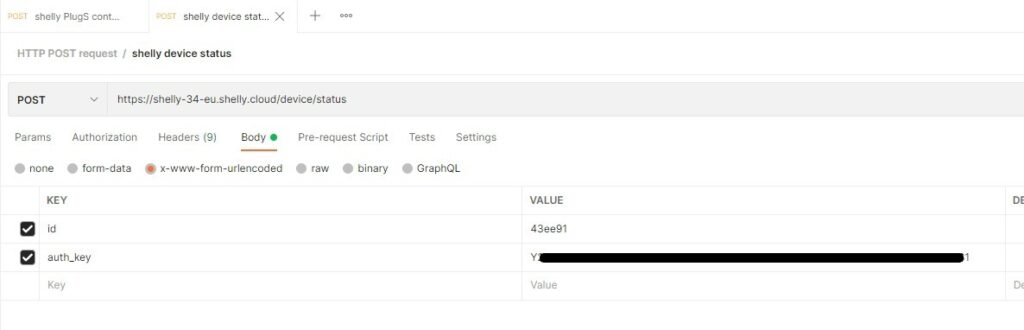
The Shelly cloud control API documentation tells us we need to get an authorization key and server URI from the Shelly cloud app. Below we tried out the API by using postman first. To start, we tried getting a status from the device to verify it works.
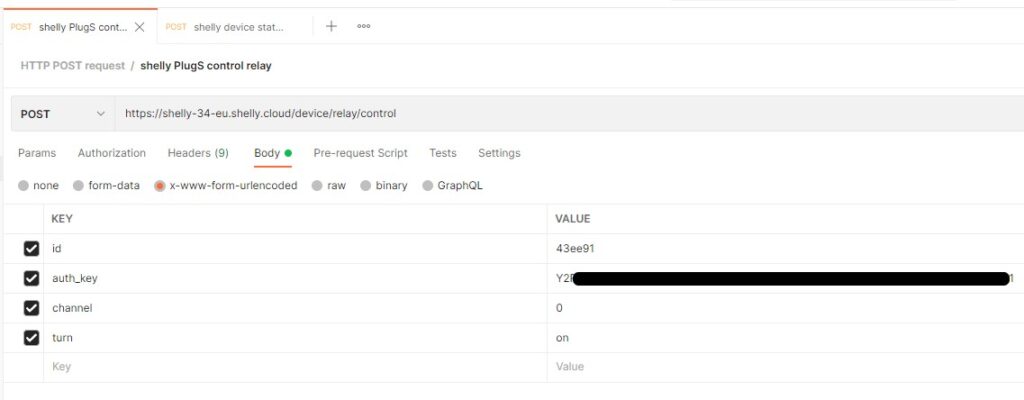
Afterward, we tried to control the smart plug relay and succeeded with the below HTTPS POST.
A pro tip with postman is that you can get the code for the same HTTP request in many different coding languages which makes it easy to insert it into your code.
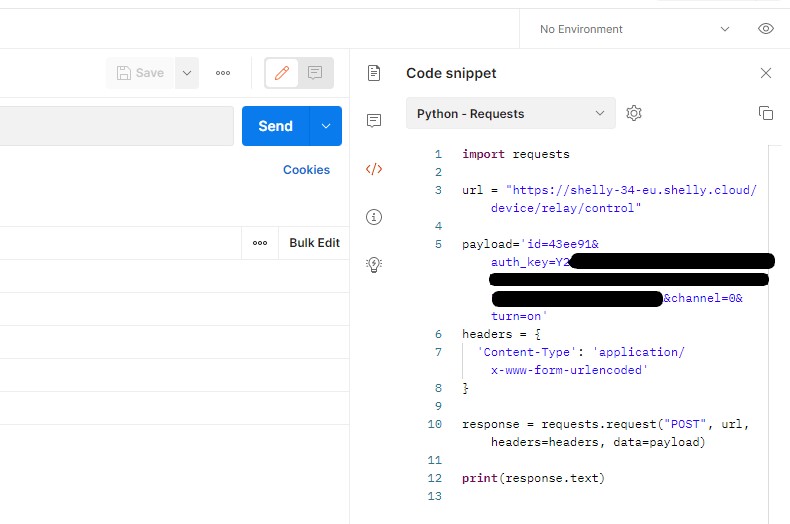
The python code to turn the smart plug and Christmas lights on or off is shown below:
def send_message_to_shelly(relay):
#the relay variable will contain the "on" or "off" command
url = "https://shelly-34-eu.shelly.cloud/device/relay/control"
payload='id=43ee91&auth_key=Y2rer6546qerg6er4g.....reAA&channel=0&turn='+relay
headers = {
'Content-Type': 'application/x-www-form-urlencoded'
}
response = requests.request("POST", url, headers=headers, data=payload)
#print(response.text)
Bringing it all together
If we now put everything together we get the following setup and code. We let the code run on a raspberry pi so it could always keep running.
#Author: Philippe Soutaer
#Feel free to use the code on your own project
#Just send us a picture of the result of your own project! :)
#Technology used here: linkedin API, Python, JSON parsing, Wi-Fi Plug & some not so smart christmas lights
import requests
import json
import time
def get_linkedin_followers():
    headers = {
        'Authorization': 'Bearer AQXNnd2kXITHELmWblJigbHEuoFdfRhOwGA0QNnumBI8X...',
    }
    params = (
        ('edgeType', 'CompanyFollowedByMember'),
    )
    response = requests.get('https://api.linkedin.com/v2/networkSizes/urn:li:organization:12345678', headers=headers, params=params)
    #print(response.text)
    #extract the followers count from the json structure
    followers_json=response.text
    followers_dict= json.loads(followers_json)
    #print(followers_dict)
    #print(followers_dict['firstDegreeSize'])
    current_followers_count= int(followers_dict['firstDegreeSize'])
    return current_followers_count

def send_message_to_shelly(relay):
    url = "https://shelly-34-eu.shelly.cloud/device/relay/control"
    payload='id=43ee91&auth_key=Y2rer6546qerg6er4g.....reAA&channel=0&turn='+relay
    headers = {
      'Content-Type': 'application/x-www-form-urlencoded'
    }
    response = requests.request("POST", url, headers=headers, data=payload)
    #print(response.text)
def turn_lights_on():
    print("turning lights on")
    send_message_to_shelly('on')

def turn_lights_off():
    print("turning lights off")
    send_message_to_shelly('off')
def main():
    previous_followers_count = 1
    sleeptime=5*60
    #code to check if follower count has increased every 5min
    while True :
        #get linkedin page follower count
        current_followers_count = get_linkedin_followers()
        #check if followerscount has increased
        print("previous follower count: ",previous_followers_count)
        print("current follower count: ",current_followers_count)
        if current_followers_count > previous_followers_count:
            previous_followers_count=current_followers_count
            turn_lights_on()
            print("christmas tree lights on for 5s")
            time.sleep(5)
            turn_lights_off()
            print("going to sleep for 5 min")
            time.sleep(sleeptime)
        else :
            time.sleep(sleeptime)
            previous_followers_count=current_followers_count #just in case someone unfollows

if __name__ == "__main__":
    #this makes main() only run when run from this file and not when this code is imported
    main()
Of course, you will need to fill in your own authorization keys for both the LinkedIn and Shelly API.
We hope you can use this how-to article to create your own IoT-connected Christmas tree!
Looking back, it was a fun little holiday project but made us so grateful and joyful every time our Christmas tree lit up when we got new followers. This way we could really feel all the support we got.
Next year we might update the setup and for example, include the functionality to change the color of the lights to set the mood using Wi-Fi led strips or let people insert their own logic to give us a nice show.
Thanks for sticking with us until the end and stay tuned for the next blog posts!